Set Up
Before starting, clean all parts thoroughly.

1. All six (6) perimeter set screws should be backed out until flush with the OD of the clamping nut.
2. Assemble the collet into the clamping nut and then start threading the clamping nut onto the tool holder.
3. Insert the cutting tool shank into the collet and finish threading the clamping nut onto the tool holder, using the spanner to tighten – Do not over tighten. Note: spanner is one size larger than typically used for each size. (i.e. ER25 uses ER32 spanner, ER32 uses ER40, etc.)
4. Snug all six (6) perimeter set screws evenly.
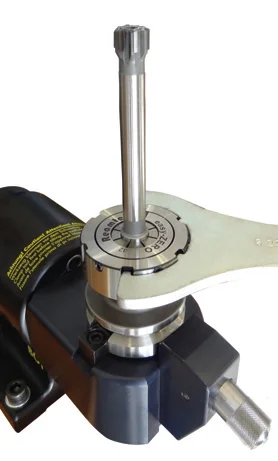

5. Place tool assembly in machine tool spindle where tool is run. Then, set dial gauge on the concentricity band or on the tool surface where zero runout is most critical. Use a 0.001mm or .0001” dial indicator. Determine the existing runout by rotating the tool holder/spindle 360 degrees. Stop at the highest point of the gauge.
6. Tighten the perimeter set screw closest to position of the highest point. If needed, loosen the perimeter set screw on the opposite side to allow front side to be tightened further.
7. Repeat this procedure until the runout is reduced to less than 0.005mm or .0002”


8. When the runout has been corrected, snug all remaining perimeter set screws and check runout again to ensure nothing has moved.
Watch how it works
